


Elevate Your Home with Trim Carpentry
Trim carpentry is the art and craft of creating beautiful and functional details in the interior of a home. From baseboards and crown molding to wainscoting and window casings, trim carpentry adds elegance, character, and value to any space. In this blog post, we will explore the world of trim carpentry and discover how these seemingly small details can make a big impact in your home.
The Basics of Trim Carpentry: Materials and Tools
The first step in trim carpentry is choosing the right materials and tools. Typically, trim is made from wood, although there are alternative materials available such as medium-density fiberboard (MDF) and polyurethane for a more durable and low-maintenance option. Common types of wood used for trim include pine, oak, and poplar, each with its unique characteristics and price points.
In addition to the materials, having the right tools is essential for trim carpentry. Some basic tools you will need include a miter saw for cutting precise angles, a coping saw for intricate cuts, a finish nailer for fastening the trim to the walls, and a level for ensuring straight and level installation. Other tools such as a caulk gun, wood filler, and a paintbrush will also come in handy to achieve a professional finish.
Types of Trim: Enhancing Your Home’s Aesthetics
Trim comes in various styles and profiles, allowing you to customize the look and feel of your home. Here are some popular types of trim used in trim carpentry:
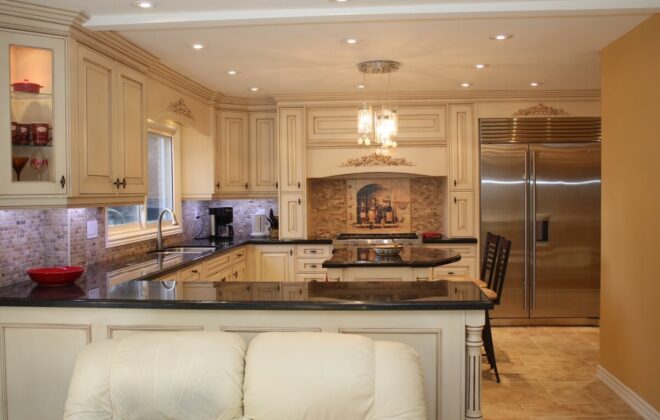
- Baseboards: Baseboards are installed at the bottom of walls where they meet the floor, covering the gap between the wall and the floor. They not only provide a finished look but also protect the walls from damage.
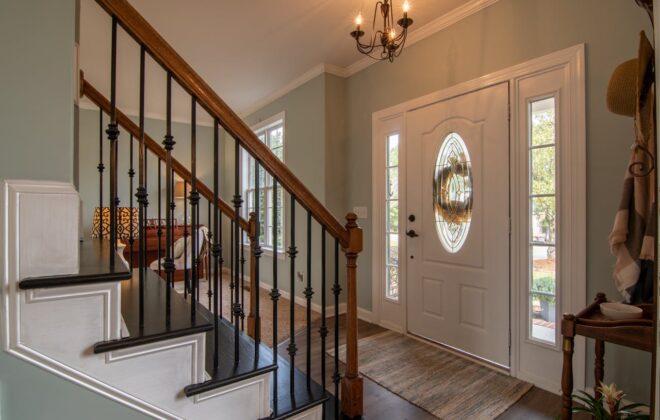
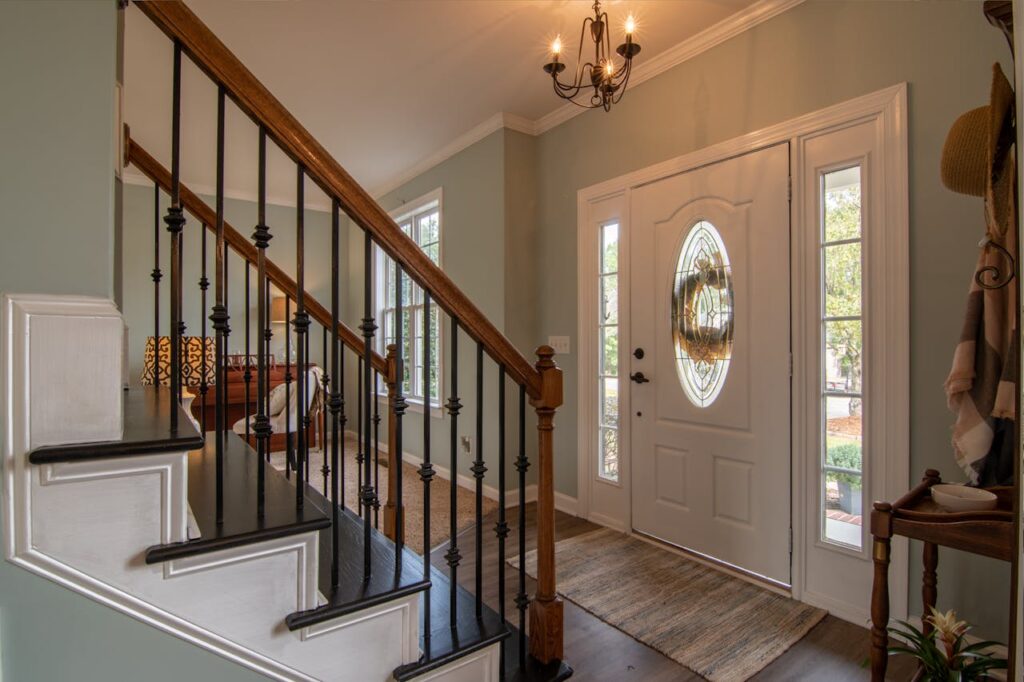
- Crown Molding: Crown molding is installed at the junction of the wall and the ceiling, adding a touch of elegance and grandeur to any room. It comes in various styles and sizes, allowing you to choose the perfect one to match your home’s architectural style.
- Window and Door Casings: Window and door casings are installed around windows and doors to provide a polished look and conceal any gaps or rough edges. They can be simple or ornate, depending on your preference and the style of your home.
- Wainscoting: Wainscoting is a type of paneling that is installed on the lower portion of walls, usually in dining rooms, hallways, or entryways. It adds texture and visual interest to walls, making them a focal point in the room.
Tips for Successful Trim Carpentry Installation
Installing trim requires precision and attention to detail. Here are some tips for successful trim carpentry installation:
- Measure Twice, Cut Once: Accurate measurements are crucial in trim carpentry to ensure a perfect fit. Always measure twice before making any cuts to avoid wastage and mistakes.
- Practice Coping: Coping is a technique used to achieve clean and tight inside corners. It involves cutting the profile of one piece of trim to fit the profile of the adjacent piece, allowing for a seamless joint.
- Use Wood Putty and Caulk: Wood putty can be used to fill nail holes and gaps in the trim, while caulk can be used to seal any visible seams or joints. Sand the filled areas and apply paint or stain for a smooth finish.
- Plan Ahead: Before installing trim, create a plan and visualize how the trim will look in the space. Consider the proportions, style, and color of the trim in relation to the room’s overall design.
Elevate Your Home’s Interior with Trim Carpentry
Trim carpentry may seem like a small detail, but it can make a significant impact on the overall aesthetics of your home’s interior. By choosing the right materials, using the proper tools, and paying attention to the details during installation, you can elevate the look and feel of your home.
In addition to its aesthetic appeal, trim carpentry also serves a functional purpose. Baseboards protect walls from damage, crown molding adds a finishing touch to the junction of walls and ceilings, and window and door casings provide a polished look while hiding gaps or rough edges. Wainscoting adds texture and visual interest to walls, making them a focal point in a room. These functional benefits make trim carpentry a worthwhile investment for your home.
When embarking on a trim carpentry project, it’s important to plan ahead and visualize how the trim will complement the overall design of your space. Accurate measurements, coping for clean inside corners, and the use of wood putty and caulk for a smooth finish are essential techniques for a successful installation. Taking the time to do it right will result in a professional-looking outcome that enhances the overall aesthetics of your home.
In conclusion, trim carpentry is an art and craft that adds elegance and character to your home’s interior. With the right materials, tools, and attention to detail, you can transform your space with beautiful trim work that enhances the overall aesthetics and value of your home. So, consider incorporating trim carpentry into your next home improvement project and experience the difference it can make in elevating your home’s interior. Happy trim carpentry!
